Search This Blog

Tuesday, February 16, 2016

Souffle

Mandi:  Another recipe in ounces (oz) oy vey!  I had to contact Deidre this morning early to request a conversion to grams.  When we converted the recipe, we were a little concerned that it would not be enough.  However, the original recipe gave me two small bowls, i.e. two hearty servings.  This is perfect for James and I who are alone at home.  The last time I made a soufflé was in high school in the Home Ed’ class!!  I think the art of having a good soufflé is to fold the whipped egg whites very gently into your mixture and being careful not mix it in completely.  You should still see some of the white peaks in the mixture when you pour it out into your dishes.

I am very happy with the way the original dish came out and I cannot wait to see what Deidre gets up to this week!!  Fortunately Deidre warned me that I would have to have my plating and photo props ready as soon as they came out the oven as with all soufflés they tend to fold in once they hit the fresh air.  Even with James removing them from the hot oven and myself standing ready with camera, it still relaxed a bit before I could get a good shot.  So this is definitely one of those recipes that, if you want to catch a shine with your guests, you will need to remove out of the oven and serve immediately for them to catch a glimpse of the “real thing”.

Recipe:

1 oz (25g) Butter or margarine
1 oz (25g) flour
¼ (150ml)pint milk
Seasoning
3 ½ oz (90g) tin tuna fish
3 egg yolks
4 egg whites

Method:

Mash the tuna fish.  Make a thick sauce of butter/margarine, flour and milk.  Add the egg yolks, one at a time.  Add the tuna and seasoning.  Lastly fold in the stiffly beaten egg whites and turn the mixture into a buttered soufflé dish, 6 inches across.  Bake for 30 min in the centre of a moderate to hot oven (400◦C – Gas 5)

A mixture of flaked fish such as smoked haddock and grated parmesan cheese makes a very good soufflé.

 
Two Perfect Tuna Fish Souffle's


Deidrè:  Another technical dish….  I can actually remember my Mom making this soufflé.  She had a round bowl, about 8 cm high with a diameter of 200 mm.  It had fluted sides and I loved that bowl. Somehow everything that was served in that bowl just tasted fantastic!!  I have visions of peas served with the soufflé but seeing as it’s close on 30 years ago, I could be wrong.

I have often joked that I have a ‘self destruct’ button which I often activate by taking on too much.  In this case, because Dylan is allergic to fish, I decided to make a salmon soufflé (found a special on tins of Salmon at Pick ‘n Pay – half price!!) and a chicken soufflé.  That way I would satisfy my fish eating sons Den and Divan, and also ensure that Dylan had something nice to eat.  My advice?  Choose one or the other because you are going to lose your mind doing both….  (Remember that nothing fishy is allowed to contaminate Dylan’s dish… so everything had to be washed up and dried off before I could start with the chicken soufflés. )

My other challenge was that I am in the process of moving house – so my bowls which I was going to use for the soufflés were already packed.  I had to make a plan by using some tin foil cups and muffin cups to make my soufflés in.  The tin foil worked like a charm, the muffin cups – not so much..

I am going to give both the salmon and the chicken recipe together.

 Recipe:

25g Butter
25g flour
150ml milk
Seasoning
90g tin salmon fish or 90g chicken pre-cooked and shredded
3 egg yolks
4 egg whites

Method:

Mash the fish or shred the chicken. 
Melt the butter in your pan.  Add the flour and mix together to make a smooth paste.
Add the milk a little at a time and whisk in between to ensure that there are no lumps.
Place bag onto the stove, stirring continuously until the sauce thickens.
Remove the pan from the stove.
Add the egg yolks, one at a time. 
 Add the fish or chicken and seasoning. 
Lastly fold in the stiffly beaten egg whites and turn the mixture into a buttered soufflé dish, 6 inches across or into ramekins.  (Or, as in my case, tin foil cups).
Bake for 30 min in the centre of a moderate to hot oven (180°C).
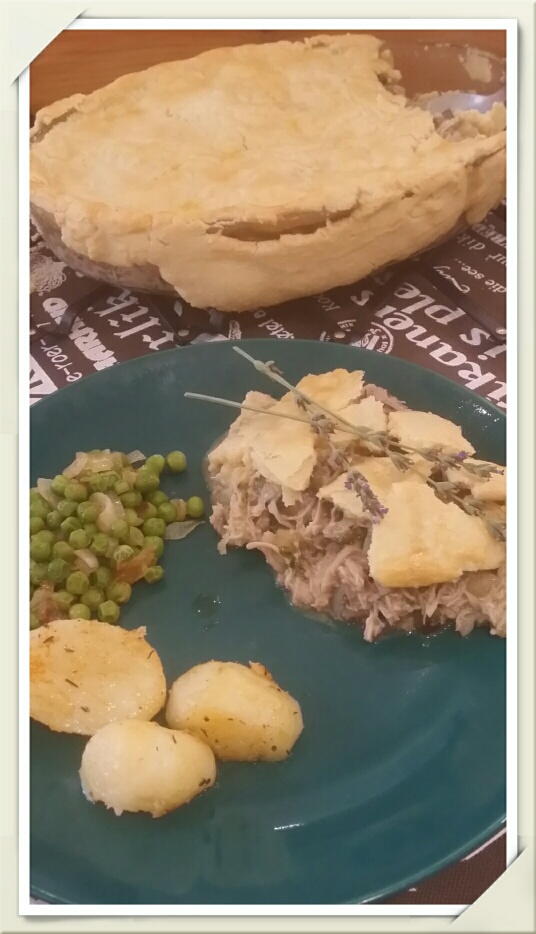
Chicken Souffles
Tips and challenges:
   * Add a pinch of salt to your egg whites if you find that they       won’t whisk to soft peaks. (You can do this with castor sugar when   making a sweet dish like lemon meringue)
*  Do not bake for longer than 30 minutes
*  Do not open the oven at any time – as soon as air reaches the        soufflés, they drop.
*  Fold the egg whites into the mixture using a metal spoon – best      practice for perfect folding.

Tuesday, February 9, 2016

Crêpes Bolognaise

Mandi:  When Deidre suggested Crêpes Bolognaise, I knew what was coming.  Pancakes!!  I have never been successful with pancakes, although it is one of the top favourite traditional foods in South Africa.  Every South African woman should be able to at least make Pancakes!  I can never get the consistency right and turning it in the pan is an art.  It’s one of those recipes where someone eventually scrapes me off the ceiling with a spatula because it never turns out right.  However, with the help of my wonderful husband James, we mastered it today. J
Saturday evenings in our home were pretty laid back and mom always looked for something easy, yet interesting to make. This was one of those dishes that was quick and very delicious.  I remember it well.  A pleasant twist to the traditional pancakes with cinnamon and sugar.  Don’t know how Deidre is going to pimp this one ;)
The Recipe says to use Toppers.  Toppers was a Soya combination pack containing Soya and the Bolognaise spice mix.  This brand is no longer made so I replaced it with a “Royco So Easy Classic Bolognaise”.  It includes noodles but I did not add them to the mix.  I also used lean beef mince instead of the Soya.  The recipe also doesn’t give you a pancake recipe so I have added my mom’s favourite pancake recipe in her cookbook.

Oil Pancake Recipe:

3.5 cups of flour
5 cups water
3 teaspoons baking powder
1 cup oil
6 eggs (or 3 eggs and 2 tablespoons vinegar)
Pinch of salt

Mix water, eggs and oil in a mixing bowl.  Mix well.  Sift flour, baking powder and salt together.  Make a hollow in the centre of the flour and gradually add liquid ingredients, stir well.

Half a mixture makes 9 pancakes.

Note 1:  Add baking powder last for best results
Note 2:  Place ½ teaspoon margarine in centre of pancake before rolling up.

Crepes Bolognaise:

8 thin pancakes
1 (120g) pkt Toppers. Bolognaise Flavour (I used Royco So Easy Classic Bolognaise)
125ml dry white wine (Use instead of the water directed on the pack)

Sauce:
30g butter
30 g flour
250ml milk
Salt and pepper to taste
Dash of nutmeg
60 g grated cheese (save for pouring over the crepes before placing in oven)
100 g grated cheese
25ml tomato sauce

Make the packet of your choice of Mince Bolognaise according to the directions on the packet, using the wine instead of water.
Use this mixture to fill the pancakes, rolling each one with sauce inside. 
Place the rolled pancakes in a casserole dish and spoon any remaining mince in between.

Sauce:
Melt butter, stir in flour and gradually stir in the milk and cook, stirring until thickened.  Season to taste and add 100g grated cheese to melt.  Pour the cheese sauce over the rolled pancakes.  Dot with tomato sauce and sprinkle with the 60g grated cheese. 
Place in oven at 200◦C  for about 20 – 25 minutes.  Serves 4 – 6. 

You can experiment with any other flavours, should be very tasty.


Deidrè:

Well, to be honest, even though this might have been the easiest recipe in the book – for me it was the most difficult to pimp.  My first idea failed dismally…  I wanted to make savoury cones and fill them with the bolognaise filling….  But my cone recipe needs some work.  My Plan B, however, was a success and apart from Dylan’s remarks that my salad lacks imagination (Masterchef Australia fan), my sons thoroughly enjoyed their meal. As with Mandi, I am not a pro at baking pancakes, so this was doubly challenging. 

So, where to begin….

I am a very ordered and organised person, so I’m going to go through the steps of compiling this dish exactly as it happened:

I have a ‘go to’ pancake recipe which Dennis (yes, I don’t bake pancakes in my home, my husband does J) always uses:


Pancakes:

30g butter
150g flour
3 eggs
500 ml milk
Vegetable oil (I usually don’t need oil – Spray and Cook is enough, but it depends on your pan)
A pinch of salt

In a small pan, melt the butter and continue cooking until it is frothy and nut-brown in colour.
Sieve the flour and salt into a mixing bowl and make a well in the centre.
Crack in the eggs and use a whisk to gradually stir the flour into them to make a paste.
Whisk in the nut-brown butter. This will give a nutty flavour to the batter and will help prevent sticking when the pancakes are being cooked.
Slowly whisk the milk into the flour, being careful to work out any lumps.  When all the milk is added the batter should be as thin as cold oil.
Pass the batter through a fine sieve and leave it to rest for 30 minutes before cooking.

During this time you can carry on with the bolognaise:

Bolognaise:

1 kg lean mince
1 medium onion, chopped
1 clove garlic, chopped
2 tblsp butter
1 tsp dried Oregano
1 tsp coriander
Salt and Pepper to taste (Recipes don’t specify exactly how much seasoning you should put in your food.  Ideally you should taste your food often while cooking so that you can season to taste)
150 ml dry white wine
2 ripe tomatoes, skins removed and roughly chopped
2 tblsp Mrs. Balls Chutney (Can’t go wrong with Mrs. Balls)

Fry the onion and the garlic in the butter until translucent
Add the mince and brown
Add the spices, tomato and chutney
Add the wine
Reduce the heat and simmer until all the wine has boiled away.
Leave to rest

Sauce:
30 g butter
30 g flour
250 ml milk
Dash of nutmeg
Salt & pepper
100 g cheese (grated)

Heat the butter until melted. Add the flour and mix thoroughly with a wooden spoon until it forms a roux.  You may want to take the pot off the stove whilst doing the next steps.  Add the milk a little at a time, mixing thoroughly to ensure that there are no lumps.  Place back onto the stove and stir continuously until the mixture thickens.  Add the cheese and stir.

Put to one side.

Now you can start frying the pancakes.  My secret weapon is a single egg frying pan which I bought for Divan when he went to university.  It is about 150 mm in diameter.
Wipe out the pan with vegetable oil.
Pour a little dough into the pan and swirl to coat the bottom of the pan.  Your pancakes should be quite thin.
Turn over when you see bubbling on the surface.

I used 5 pancakes for the stack.  Place a pancake on your serving dish, spread mince filling over the top.  Add another pancake and continue until you have a 5 pancake stack.  Pour the cheese sauce over the top and serve.  Voila!!

Tips and Challenges:

1.  It is important to leave your pancake dough to rest for 30 minutes.  This allows for the starch in the flour to swell which ensures a nice light texture to the pancakes.
2.  The sauce is a bit harder to make than it looks.  It burns easily when you are adding the flour to the butter.  This is why it is best to remove the pot from the stove while mixing the roux and adding the milk. You can return it to the plate once this is done.
3.  When placing your filling on your pancakes, spread the filling to the edges of the pancake.  By doing this you avoid the ‘dome’ effect I had on mine and the filling doesn’t roll off the edges.
4.  Get yourself a small one egg frying pan – can use it in a multitude of ways.


Special mention goes to James and Dennis – our life savers.  These two men baked our pancakes to perfection.  Thanks guys!!


Sunday, January 31, 2016

Malva Pudding


Mandi:  The wonderful thing about Malva tart is that you can eat it after a hearty family meal as pudding or as a sweet for afternoon visitors.  I always enjoyed this recipe no matter when it was made and if my memory serves me correctly, it was usually a Sunday Afternoon treat when we had visitors served with coffee or tea.  This is the very first time that I have ever made the dish myself.  Why, I cannot tell because it’s a very easy recipe and there is really nothing to it.  I was concerned that there was not enough sauce for the cake but this afternoon when I served it to my mom and dad, my dad recalled that my mom always made extra sauce to give it that soaked texture which is the signature of the traditional Malva Tart.  I had some ideal milk left from the sauce that I made and poured it into the bottom of the pudding bowls so that it could soak up some more moisture.  Next time I will definitely make more sauce.
 
 Malva pudding
50g Margarine
1 Extra large egg
5ml vinegar
3ml salt
150ml milk
125ml sugar (100g)
15ml Apricot Jam
250 ml cake flour (140g)
5ml Bicarbonate of Soda

Sauce:
170g can of evaporated milk
100ml sugar (75g)
5ml vanilla
Cream margarine and sugar.  Add the egg, beating until light and fluffy.  Mix in the jam and vinegar.  Sift the dry ingredients and add, with milk beating until smooth.  Spoon into a greased medium oven proof dish and bake in a preheated oven at 180 ◦C for 30 – 40 minutes.
 For Sauce:  Heat the evaporated milk and sugar till sugar melts.  Remove from heat and add vanilla.  Pour sauce over the top as soon as pudding is taken out of the oven.
 Serves 4 – 6 (if you cut smaller portions, you will get up to 10 pieces)


Deidre:  The smell of Malva pudding takes me straight back to big family lunches after the church service on Sundays.  Everyone would be there – aunts, uncles, Ouma and Oupa.  I can still see Oupa welcoming us as Ouma was busy in the kitchen putting the final touches to the dishes she had prepared – and the sweet gooey smell of Malva pudding.  We would walk through to the kitchen and Ouma would greet us, the warmth of her smile reaching her eyes as she gave us each a hug.

As with the bobotie, Malva pudding is a very traditional South African pudding.  I hope that I pimped it without it losing its special identity.

Malva pudding
50g butter (one can never have too much butter)
1 Extra large egg
5ml vinegar
3ml salt
150ml milk
125ml sugar (100g)
Apricot Jam
250 ml cake flour (140g)
5ml Bicarbonate of Soda
½ tsp cinnamon

Sauce:
250 ml evaporated milk
140g sugar
5ml vanilla

Pre-heat your oven to 180°C.
Prepare a muffin tin by spraying with spray and cook.
Place spoonfuls of apricot jam on a sprayed baking tray and place in the freezer for1 hour.

Cream the butter and sugar. 
Add the egg, beating until light and fluffy. 
Add the vinegar and mix thoroughly. 
Sift the dry ingredients and add, alternating with milk.  Beat until smooth. 
Place one spoonful of mixture into each greased muffin hole.
Place one of the frozen spoonfuls of apricot jam in the centre of each muffin.
Fill until ¾ full.
My mixture made 8 malva muffins.
Bake in the oven for 30 minutes.

 For Sauce:  Mandi warned me that the original sauce recipe was not enough for the dish, so I doubled the quantities.
Heat the evaporated milk and sugar till sugar melts.  Remove from heat and add vanilla.  Pour spoonfuls of sauce over the top of the muffins as soon as they are removed from the oven.
Pour the rest into a jug for serving.
This is a very quick and easy way of baking a malva pudding, and as they are individual portions there’s not squabbling about sizes J.

Challenges and tips:
1. No real challenges apart from cleaning up the gooey sauce from cabinets etc. when I poured spoonfuls of the sauce over the muffins – rather do this over the sink;
2. Tips- I added ½ teaspoon of cinnamon to the batter – gives it a delicious spicy flavour;
3. I didn’t mix my apricot jam in with the dough as I wanted the apricot jam to form a layer in the middle of the malva pudding, instead it made a tangy layer at the bottom of the muffin – still very nice though!


Thursday, January 28, 2016

Sunday Chicken Pie

Mandi and I were blessed to be able to cook the recipe for our 4th blog insert together.  As usual this experience had its moments of hysterical laughter and utter silence as we contemplated and concentrated on our dishes.  Times like these are precious and I am grateful that we are granted these opportunities of spending quality time together….

Mandi:
To be honest, I don't remember this recipe and I am sure if mom did make it, she wouldn't have bothered with the crust. It was wonderful cooking together with someone who has a lot more technical expertise than me and to get good advice as we went along. 
It seems pastry and I do not gel well and both Deidre and I agreed that this pastry is not the best one for this dish. Personally I think I will opt for a puff pastry. The filling is absolutely delicious, really more-ish.
Sunday Chicken Pie
Pastry:
125g cake flour (unsifted)
Pinch of salt
100g cold butter or margarine
50 ml ice water (this is really not necessary)

Filling:
1kg chicken pieces
2 Onions diced
25g butter or margarine
100g mushrooms sliced
50ml chopped parsley
5 ml salt
5ml dried thyme
Pinch of pepper
200ml dry red wine
30 ml maizena
1 egg beaten (optional)

Sieve the flour and salt together. Rub in the butter until mixed together. Add water and mix till completely blended together.  Cover and cool for approximately an hour. 
Cover the chicken pieces with water, flavour with salt and pepper and cook. Allow the meat to cool in the stock and then debone.  Keep 100 ml of the stock.
Fry the onions in the butter until golden brown, add mushrooms and fry for a few minutes. Add meat, parsley , salt, thyme and pepper and mix together. Dish the meat into a shallow pie dish about 24cm in diameter.
Heat the wine and 100ml stock you kept over from the chicken.  Mix Maizena with a little water and add to the mixture.  Cook until nice and thick. Add to meat and mix gently.
Roll out your pastry on a floured surface. Place over your pie filling and neaten the edge of the pie dish.  Cut an opening or two in the pie crust to allow the steam to escape.  Brush with the beaten egg.  Bake 25 - 30 min at 200 ° C.
Delivers 6 portions.  If you have cooked your chicken the night before and deboned it, this recipe should take approximately 2 hours, start to finish.
My side dish was roasted potatoes and savoury peas.  Mom always made these as her side dish for pies (or a fresh salad).


Deidrè:
From the moment I knew that we were doing the Sunday Chicken Pie, I thought about making a deconstructed pie.  (I love the word ‘deconstructed’…. It sounds so Michelin star!)  But how I would manage it, that I had to figure out as I went along.  There were quite a few challenges with this recipe.  My initial idea was to make a puff pastry for my crust, but then I thought that it might be more in line with the original recipe to use the original crust….  Won’t do that again – I will use my gut instinct.  Not that the original crust is so bad.  It is a shortbread pastry which is most probably wonderful with other dishes, but not for this. It is extremely soft and difficult to roll out.  It also breaks when you place it on the pie dish (see Mandi’s photo of her dish).

Mandi and I sat the night before and worked through my recipe.  Some points had to change as I was cooking when I realised “Well, that’s not going to work……”  But overall, the final result was phenomenal (even if I have to say so myselfJ)

So, here goes:

Deconstructed Sunday Chicken Pie:

Pastry:
125 g unsifted flour
Pinch of salt
100 g cold butter
50 ml Water (not needed, use only if needed)
Sieve together salt & flour.
Add butter and mix well until blended. (You may need more flour to make it workable)
Place in clingwrap in the fridge (we made the pastry the night before and left it overnight in the fridge.  Because of the amount of butter used, the pastry was rock hard in the morning when we wanted to use it!  We left it to thaw in the sun and could work it about an hour later….

Filling:
1 kg chicken
10 carrots
250 g mushrooms, sliced
Chopped parsley, diced (50 ml)
2 onions, diced
25 g butter
5 ml dried thyme
Pinch pepper
5 ml salt
200 ml dry red wine
30 ml Maizena
1 egg beaten
(Ideal Milk – used to improve the gravy J)

Boil the chicken, salt and pepper until meat is soft and falls off the bones – allow to cool in the stock. (Please warn your guests that there might still be small bones in the mixture….)
Remove the chicken and debone.
Keep the stock!!
Set 200 ml of stock aside for the gravy and use the rest to boil the carrots.
Carrot layer:
Slice the carrots into 1 cm rounds and boil in the stock until soft.
Blend to make a mash (Mash should be stiff, not runny.  Add Maizena to get the desired consistency)
Mushroom layer:
Fry the mushrooms in butter until cooked, set aside
Chicken layer:
Fry the onions in butter until golden brown.
Add the meat, parsley, salt, thyme and pepper and mix.
Pastry layer:
Roll out the pastry until +/- 1 cm thick
Cut into rounds the same diameter as your stacking mould
Brush with beaten egg
Bake in a 200°C oven until golden brown


Gravy:
Heat 200 ml of stock and 200 ml of dry red wine.
Reduce to about 250 ml.
Mix a little cold water with Maizena to make a paste
Add to the wine/stock mixture until it forms a pouring consistency.
My gravy was a little stiff, so I added Ideal Milk until it reached the right consistency….it also made the gravy nice and creamy.

Construction:
Take your stacking mould (I don’t have one, so I found a 215g Chakalaka tin at Pick ‘n Pay and cut off both lids (top and bottom)  This is a perfect size for your stack)
Place your mould in the centre of your plate and add the carrot mash layer (about 1.5 cm)
Next place a layer of mushrooms on top of the carrot layer
Fill up with the chicken mixture (press down to make the stack compact)
Gently lift the stacking mould (chakalaka tin) off the filling – it should form a tower
Place the rounds of pastry on top of the tower.
Pour the gravy on the pastry and around the stack
Decorate with a fresh thyme leaf and serve.

Challenges:

1.  As mentioned above, the pastry is very finicky to work with – I would rather use a puff pastry
2.  Keeping the different elements warm until you serve – and while you plate up.  A warming tray would work well.

It took me the same time as Mandi to complete this dish from start to finish....


Monday, January 18, 2016

Fish Bobotie

Mandi:
I smiled today, opening the cookbook again on the page with the recipe for this week.   As a child, I suffered with severe separation anxiety and my poor mother couldn’t turn her back without me clinging to her apron strings.  If mom wanted to go to Church or to a prayer meeting during the week, she would have to come up with some ingenious ways to hold my attention.  One of these was to decorate her cook book or to write out some recipes for her.  This could hold my attention span for at least an hour, long enough for her to enjoy her service and be home before I was too hysterical or had noticed she’d been gone too long.  The recipe this week is a perfect example of my artistic finesse at the age of 10, as I turned a glued recipe from a Pilchards tin into a “Chef”. (see Photograph)  I enjoyed making this recipe.  Will definitely do it again!  


Fish Bobotie:
2 Large tins Pilchards (plain or middlecut)
2 medium sized onions
1 dessertspoon sugar
1 dessertspoon lemon juice
2 tablespoons vinegar
1 tablespoons turmeric
Salt & Pepper to taste
Brown the onions in margarine, then add sugar, lemon juice, vinegar, turmeric, salt and pepper.  Soak 1 piece stale white bread in water.  Crumb, and add 1 beaten egg.  Add this with the turmeric etc. to the fish (finely mashed in a bowl).  Then beat another egg with a cup of milk and 1 tablespoon Maizena.  Pour over the fish mixture and bake in a 180◦/350◦ oven till golden brown.  Serve with rice.
I have added turmeric to my rice as well with sultanas.
I can see why mom used this recipe.  It’s fast, convenient and tastes amazing.  I think for the housewife generation, they went for recipes that were fast - the quicker the better.  So much easier to come home from church and throw the ingredients together. It took me about 15 mins to get all the ingredients into one bowl and then into the oven.  You could be eating within 45 minutes of starting your dish.
P.S.  this recipe was taken from the inside of a Pilchards tin label- 1981.


Deidrè:

I faced a serious challenge when I heard we were cooking fish bobotie for the blog… not only is it an iconic dish in South Africa, it had already been ‘pimped’ in a fashion.  Bobotie is traditionally made with minced beef.

I eventually decided to use the bobotie as a filling, either in a phyllo parcel or as a spring roll.  The spring roll won as it seemed to be the greatest challenge.  If you have not realised yet, I love a challenge and learning new techniques in any activity is something I enjoy.

So, here is my recipe:

Fish Bobotie Baked Spring Rolls:

450g Hake medalions (Or any other firm fleshed fish)
2 cups milk
1 tsp dried parsley
1 large onion, diced
1 tbsp butter
1 tbsp sugar
1 tbsp lemon juice
2 tbsp vinegar (I used apple cider vinegar)
1 tbsp turmeric (Borrie)
50g tomato paste sachet
Salt & pepper to taste
1 slice stale brown bread (bread is eaten at such a rate in my home that there is never any stale bread – I used a fresh slice)
2 cups milk
1 beaten egg

Filling:

Poach the fish in the milk with ½ tsp salt and 1 tsp parsley until flaky
Remove the fish from the milk and place in a bowl – keep the milk
Flake the fish
Place the slice of bread in the milk to soak
In a pan, brown the onion.
Add the sugar, lemon juice, vinegar, turmeric, salt & pepper and tomato paste
Squeeze the milk from the bread and crumb into the onion mixture
Add 1 beaten egg and mix thoroughly
Add the mixture to the flaked fish and mix.
[Strain the milk into a new pot and keep for the custard]

Spring Rolls:

1 box phyllo pastry (defrost in the fridge overnight)
Olive oil/melted butter

Separate two sheets of phyllo pastry and place on working surface
Cut into 4 squares
Using the example below, place fish bobotie filling in one corner and roll the pastry to form a spring roll (I found that the corner wouldn’t stick to the pastry without brushing a bit of water on the roll and sticking the corner down)
Place on a rack in a baking dish
Brush with olive oil or melted butter


Bake in a preheated 220°C oven for 10 minutes.  After 10 minutes, turn and bake for a further 8 minutes
Check continuously that they don’t burn.  [Time dependant on your oven.]

Egg Custard:

The original bobotie has an egg custard which you pour over the bobotie prior to baking.  This custard (as seen on Mandi’s photograph)forms a coating over the bobotie.  I decided to make a curry flavoured egg custard to pour over the spring rolls thereby incorporating the custard from the original dish into the pimped version.

Left over milk from poaching the fish topped up to make 450 ml
Pinch of salt
1 ½ tsp Maizena
½ tsp curry powder (I used mild)
2 egg yolks

Bring the milk to just below boiling point on the stove
In a large bowl, whisk together the egg yolks, Maizena and curry powder
Pour the hot milk into the egg yolks and Maizena mixture, whisking continuously
Pour the mixture back into the pan and stir with a wooden spoon until the mixture thickens
The mixture should coat the back of the wooden spoon.

Pour the custard over the spring rolls when serving.

I would use this recipe for a starter.  It is incredibly filling, so two should be ample for a serving.